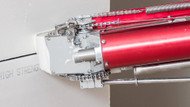
Automatic Taper Drive Dog Spring Replacement
Author: Lucas H
Publish Date: November 15, 2021
Watch lead technician Robby Deatherage as he quickly walks you through the couple of steps it takes to get your old drive dog spring out and the new one in. With no more than a flathead screwdriver and 30 seconds of your time you can have your drive dog spring replaced and be back to drywall taping like a pro!
REPLACING THE DRIVE DOG SPRING ON AN AUTOMATIC DRYWALL TAPER
We get asked all the time, “Why am I getting dry patches when I’m drywall taping with my auto taper?”, and the problem is often that the drive dog key is popping over the teeth on the drive dog assembly sprocket. In less technical terms, the old spring has lost its tension and no longer advances mud at the same time as tape when drywall taping.
The automatic taper is one of the more complicated drywall tools going and that’s why at LEVEL5 Tools we have taken every step possible to make things simple and make the parts that are prone to wear easy and affordable to fix.
For more tips, tricks and how-tos when it comes to maintaining and repairing your drywall tools, make sure to check out the following articles and subscribe to our YouTube channel!


